
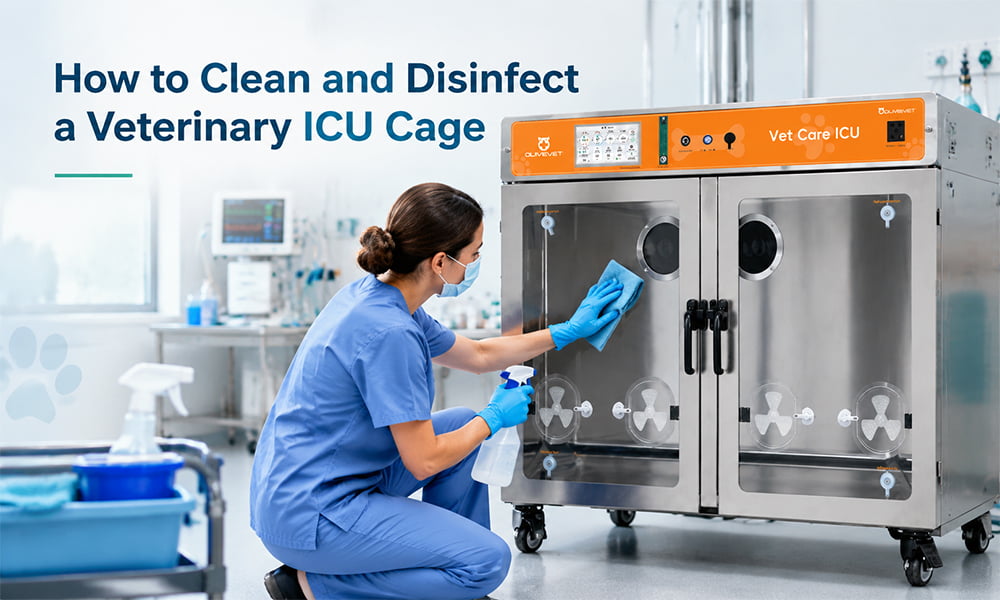
Veterinary ICU cage cleaning involves more than simply wiping down visible dirt. A proper cleaning process should remove organic material, prepare surfaces for disinfection, use an appropriate disinfectant correctly, and ensure that the cage is completely dry before another patient is introduced.
After cleaning, return the patient to a fully disinfected veterinary ICU cage with oxygen, temperature and humidity control.
In this guide, we explain how to clean and disinfect a veterinary ICU cage, how often it should be cleaned, common cleaning mistakes to avoid, and which ICU cage design features can make routine cleaning easier for veterinary staff.
Why Veterinary ICU Cage Cleaning Matters
Veterinary ICU cages may house patients with respiratory disease, infectious conditions, postoperative complications, trauma, or other medical problems. During hospitalization, cages can become contaminated with urine, feces, blood, vomit, respiratory secretions, hair, food, and other organic material.
Regular cleaning and disinfection help maintain a hygienic patient environment and support the veterinary facility’s infection-control procedures.
Proper veterinary ICU cage cleaning is particularly important when cages are used for:
- Postoperative recovery
- Respiratory patients
- Patients receiving oxygen therapy
- Critically ill animals
- Immunocompromised patients
- Patients with suspected or confirmed infectious diseases
A consistent cleaning protocol can also help veterinary technicians identify damaged components, blocked ventilation openings, worn seals, or other maintenance issues before the cage is returned to service.
Cleaning vs. Disinfection: What’s the Difference?
Cleaning and disinfection are related but different processes. Understanding the difference is important when establishing a veterinary ICU cage cleaning protocol.
What Is Cleaning?
Cleaning is the physical removal of dirt, debris, organic material, and other visible contamination from a surface.
For an ICU cage, cleaning may include removing:
- Urine
- Feces
- Blood
- Vomit
- Food residue
- Hair and fur
- Respiratory secretions
- Other visible organic material
Cleaning should generally be performed before disinfection because organic material and dirt can interfere with the effectiveness of some disinfectants.
What Is Disinfection?
Disinfection is the application of an appropriate chemical or other approved method to reduce microorganisms on a properly cleaned surface.
Effective disinfection depends on several factors, including:
- The disinfectant selected
- Correct dilution or concentration
- Complete surface coverage
- Required contact time
- Surface compatibility
- Rinsing requirements
- Proper drying
Cleaning removes contamination; disinfection is performed after cleaning to reduce microorganisms on the cleaned surface.
How to Clean a Veterinary ICU Cage Step by Step
A consistent cleaning procedure helps veterinary staff maintain an efficient workflow. The exact protocol should always be adapted to the facility’s infection-control procedures, patient population, cage manufacturer’s instructions, and disinfectant manufacturer’s instructions.
1. Remove the Patient and Prepare the Cage
Before cleaning, move the patient to an appropriate temporary location according to the veterinary team’s instructions.
Then remove items from the cage, including:
- Bedding
- Food and water bowls
- Toys
- Disposable materials
- Other removable accessories
Veterinary staff should use appropriate personal protective equipment (PPE) based on the patient’s condition and the facility’s infection-control procedures.
2. Remove Waste and Organic Material
Remove all visible contamination before applying disinfectant.
Pay particular attention to areas where fluids and debris may accumulate, including:
- Floor or bottom tray
- Corners
- Door edges
- Ventilation areas
- Drainage areas
- Surfaces around food and water containers
Large amounts of organic material should be physically removed rather than relying on disinfectant to break down heavy contamination.
3. Remove and Clean Detachable Components
Many veterinary ICU cages include removable components that make cleaning easier. Depending on the cage design, these may include trays, shelves, partitions, feeding accessories, or other removable parts.
Remove these components whenever appropriate and clean them separately.
A removable waste tray can be particularly useful because veterinary staff can remove contaminated material without having to clean the entire cage in place.
4. Wash the Cage Surfaces
After visible contamination has been removed, wash the cage surfaces using an appropriate detergent or cleaning solution according to the manufacturer’s instructions.
Use suitable cleaning tools such as:
- Soft brushes
- Non-abrasive sponges
- Clean cloths
- Other approved cleaning tools
Clean the interior surfaces systematically and pay attention to corners, edges, doors, trays, and other areas that may be overlooked during routine cleaning.
Avoid abrasive materials that could damage the surface or create scratches that make future cleaning more difficult.
5. Apply an Appropriate Disinfectant
Once the cage has been properly cleaned, apply a disinfectant appropriate for the intended veterinary application and cage materials.
Always follow the disinfectant manufacturer’s instructions regarding:
- Recommended dilution
- Application method
- Required contact time
- Rinsing requirements
- Surface compatibility
- Safety precautions
Do not assume that using a higher concentration will always provide better results. Using a disinfectant incorrectly can damage equipment or create unnecessary risks for veterinary staff and animals.
6. Respect the Required Contact Time
One common mistake in veterinary ICU cage disinfection is wiping away the disinfectant before the required contact time has been reached.
The surface needs to remain appropriately wet for the period specified by the disinfectant manufacturer for the intended use.
If the disinfectant dries too quickly, follow the manufacturer’s instructions for maintaining the required contact time.
7. Rinse When Required
Not every disinfectant requires rinsing. However, if the product instructions require rinsing, the cage should be thoroughly rinsed with clean water after the required contact time.
Rinsing may be particularly important for surfaces that animals will directly contact.
Always follow the disinfectant label and the veterinary facility’s established cleaning protocol rather than using a one-size-fits-all procedure.
8. Dry the Cage Completely
Allow the cage to dry completely before returning an animal to it.
Pay attention to:
- Cage floor
- Removable trays
- Corners
- Door edges
- Drainage areas
- Other areas where water may collect
Depending on the facility’s procedure, the cage may be air-dried or dried using clean, appropriate materials.
A clean and dry cage provides a better environment for the next patient and helps prevent unnecessary moisture from remaining on surfaces.
9. Inspect the Cage Before Reuse
Cleaning is also an opportunity to perform a quick equipment inspection.
Before returning the cage to service, check:
- Interior and exterior surfaces
- Door operation
- Latches and hinges
- Removable tray
- Seals and gaskets
- Oxygen inlet and connections
- Ventilation openings
- Temperature and humidity sensors
- Control panel
- Electrical components
If any component is damaged or malfunctioning, it should be addressed according to the manufacturer’s maintenance recommendations before the cage is used again.
How to Disinfect a Veterinary ICU Cage
A practical veterinary ICU cage disinfection workflow can be summarized as follows:
- Remove the patient and personal items.
- Remove bedding and disposable materials.
- Remove visible waste and organic material.
- Remove detachable components such as trays and accessories.
- Clean cage surfaces with an appropriate detergent or cleaning solution.
- Rinse the surfaces when required.
- Apply an appropriate disinfectant.
- Maintain the required disinfectant contact time.
- Rinse the surfaces if required by the product instructions.
- Allow the cage and components to dry completely.
- Inspect the cage and accessories.
- Return the cage to service when it is clean, dry, and ready for use.
This general process should not replace a veterinary hospital’s own infection-control SOP. Different patients and infectious risks may require different procedures.
How to Choose a Disinfectant for a Veterinary ICU Cage
Choosing a disinfectant should be based on the veterinary facility’s infection-control requirements and the manufacturer’s instructions.
Important factors include:
- Effectiveness: The product should be appropriate for the microorganisms relevant to the intended application.
- Material compatibility: The disinfectant should be compatible with stainless steel, plastics, seals, coatings, and other cage materials.
- Contact time: Consider how long the surface needs to remain wet for the product to work as intended.
- Dilution: Follow the manufacturer’s specified concentration rather than assuming a stronger solution is better.
- Residue: Consider whether the product leaves residue on animal-contact surfaces.
- Rinsing requirements: Determine whether surfaces need to be rinsed after disinfection.
- Animal and staff safety: Follow all applicable safety instructions and PPE requirements.
Always follow the disinfectant manufacturer’s label and your veterinary facility’s infection-control protocol.
How Often Should a Veterinary ICU Cage Be Cleaned?
The required cleaning frequency depends on the patient, the level of contamination, the cage’s use, and the veterinary facility’s infection-control procedures.
Between Patients
A thorough cleaning and disinfection process should be performed between patients before the cage is reused, following the facility’s established protocol.
During Patient Care
Spot cleaning may be necessary during a patient’s stay if the cage becomes contaminated with:
- Urine
- Feces
- Blood
- Vomit
- Respiratory secretions
- Food or other debris
The cleaning frequency should be adjusted according to the patient’s condition and the degree of contamination.
Routine Equipment Maintenance
In addition to routine surface cleaning, veterinary staff should periodically inspect the cage itself.
Check components such as:
- Doors and latches
- Trays
- Seals
- Ventilation openings
- Oxygen connections
- Sensors
- Drainage components
- Control systems
A fixed cleaning and maintenance schedule can help prevent small equipment problems from becoming larger operational issues.
Special Considerations for Veterinary Oxygen Cages
Cleaning a veterinary oxygen cage requires some additional attention because the cage may contain oxygen connections, ventilation components, sensors, temperature controls, humidity controls, or electronic systems.
Check Oxygen Connections
During routine cleaning, inspect the oxygen inlet, tubing, connectors, and other oxygen-delivery components.
Do not allow cleaning chemicals, water, or debris to enter oxygen connections.
Keep Ventilation Openings Clear
Ventilation openings should remain free of dust, fur, debris, and chemical residue.
Blocked ventilation areas can interfere with the intended airflow and environmental control of the cage.
Protect Sensors and Control Components
Temperature, humidity, oxygen, and other sensors should be cleaned according to the equipment manufacturer’s instructions.
Do not directly spray liquid onto electrical components, displays, control panels, or sensitive sensors unless specifically permitted by the manufacturer.
Inspect Door Seals and Gaskets
Door seals and gaskets should be inspected regularly for visible damage, deformation, or excessive wear.
Keeping these components clean and properly maintained is particularly important for cages designed to provide a controlled internal environment.
How to Clean a Stainless Steel Veterinary ICU Cage
Stainless steel is widely used in veterinary equipment because it is durable and can be cleaned and maintained appropriately. However, even stainless steel surfaces require proper care.
Recommended Practices
- Use appropriate cleaning solutions.
- Use non-abrasive cleaning tools.
- Remove chemical residue when required.
- Dry stainless steel surfaces after cleaning.
- Follow the cage manufacturer’s maintenance recommendations.
- Inspect surfaces periodically for corrosion or damage.
What to Avoid
- Using abrasive pads that can scratch surfaces
- Using chemicals that are not approved for the cage material
- Leaving chemical residue on animal-contact surfaces
- Allowing corrosive chemicals to remain on surfaces longer than recommended
- Directly spraying electrical components
Proper maintenance can help preserve the appearance and functionality of stainless steel veterinary equipment over time.
Common Veterinary ICU Cage Cleaning Mistakes
Even when a clinic has a regular cleaning routine, several common mistakes can reduce the effectiveness of the process or cause unnecessary equipment wear.
1. Disinfecting Without Cleaning First
Applying disinfectant to heavily contaminated surfaces without first removing organic material can reduce the effectiveness of the disinfection process.
2. Using the Wrong Disinfectant Dilution
Using an incorrect concentration can reduce effectiveness or increase the risk of surface damage and chemical exposure.
3. Ignoring Contact Time
Wiping away a disinfectant immediately after application may not provide the contact time specified by the product manufacturer.
4. Returning the Patient Too Soon
Putting an animal back into a cage before surfaces are properly cleaned, rinsed when required, and dried can undermine the cleaning process.
5. Spraying Electrical Components Directly
Directly spraying control panels, displays, sensors, electrical connections, or other sensitive components can damage equipment.
6. Forgetting Removable Trays
Trays can collect significant amounts of waste and fluid. They should be removed and cleaned as part of the cage cleaning process whenever appropriate.
7. Not Inspecting the Cage After Cleaning
A cage can appear clean while still having damaged seals, blocked ventilation openings, loose fittings, or other maintenance issues. A quick inspection helps identify these problems before the next patient arrives.
Veterinary ICU Cage Cleaning Checklist
The following checklist can be used as a general reference when developing a veterinary ICU cage cleaning procedure.
- ☐ Remove the patient
- ☐ Wear appropriate PPE
- ☐ Remove bedding and accessories
- ☐ Remove visible waste and organic material
- ☐ Remove and clean the tray
- ☐ Wash cage surfaces
- ☐ Rinse surfaces when required
- ☐ Apply an appropriate disinfectant
- ☐ Follow the required contact time
- ☐ Rinse when required
- ☐ Dry the cage completely
- ☐ Clean removable accessories
- ☐ Check doors and latches
- ☐ Check oxygen connections
- ☐ Check ventilation openings
- ☐ Inspect sensors and control components
- ☐ Confirm the cage is clean and dry before reuse
This checklist should be adapted to the specific cage model, patient population, and veterinary facility’s infection-control procedures.
How ICU Cage Design Makes Cleaning Easier
Cleaning procedures are important, but ICU cage design can also have a major impact on how efficiently veterinary staff can clean and maintain the equipment.
Easy-to-Clean Surfaces
Smooth, durable surfaces can make routine cleaning easier and reduce areas where dirt, fluids, and other contamination can accumulate.
Removable Waste Tray
A removable tray allows veterinary staff to quickly remove waste and contaminated materials without having to move the entire cage.
Accessible Interior
The interior should be easy for staff to access so that corners, walls, doors, and other surfaces can be thoroughly cleaned.
Rounded Corners
Well-designed corners can reduce difficult-to-reach areas and make routine wiping and disinfection more efficient.
Durable Materials
Veterinary ICU cages are exposed to frequent cleaning and disinfection. Durable materials that are appropriate for the intended cleaning protocol can support long-term use in busy veterinary environments.
When purchasing an ICU cage, it is therefore worth considering not only its oxygen and environmental-control capabilities, but also how easy it will be for veterinary staff to clean, disinfect, inspect, and maintain every day.
Final Thoughts
Effective veterinary ICU cage cleaning starts with removing visible contamination and organic material, followed by appropriate disinfection, sufficient contact time, rinsing when required, and complete drying.
Cleaning procedures should also be combined with regular equipment inspection. Doors, trays, seals, ventilation openings, oxygen connections, sensors, and control components should all be checked as part of routine maintenance.
For veterinary clinics and animal hospitals, choosing an ICU cage with easy-to-clean surfaces, accessible interior areas, removable trays, durable construction, and practical maintenance features can make everyday cleaning more efficient.
Looking for a veterinary ICU cage designed for professional veterinary environments and convenient daily maintenance? Contact OliveVet to discuss your veterinary ICU equipment requirements.
Frequently Asked Questions About Veterinary ICU Cage Cleaning
How often should a veterinary ICU cage be cleaned?
A veterinary ICU cage should generally undergo thorough cleaning and disinfection between patients according to the veterinary facility’s infection-control protocol. During a patient’s stay, spot cleaning may be required whenever the cage becomes contaminated with urine, feces, blood, vomit, respiratory secretions, or other material.
How do you disinfect a veterinary ICU cage between patients?
First remove the patient, bedding, accessories, and visible organic material. Clean the cage surfaces, rinse when required, apply an appropriate disinfectant, follow the specified contact time, rinse if required, and allow the cage to dry completely before reuse.
What disinfectant can be used on a veterinary ICU cage?
The appropriate disinfectant depends on the pathogens of concern, cage materials, facility protocols, and manufacturer instructions. Always select a product approved or appropriate for the intended veterinary application and follow its label instructions for dilution, contact time, and rinsing.
Can bleach be used to disinfect a veterinary ICU cage?
Some facilities may use bleach-based disinfectants for specific applications, but suitability depends on the product, concentration, surface material, and infection-control protocol. Follow the disinfectant manufacturer’s instructions and the cage manufacturer’s recommendations before using bleach or any other chemical.
How do you clean a veterinary oxygen cage?
Clean and disinfect the cage surfaces and removable components as usual, but take additional care around oxygen connections, ventilation openings, sensors, control panels, and electrical components. Avoid allowing liquids or cleaning chemicals to enter sensitive components.
What makes a veterinary ICU cage easy to clean?
Features such as smooth cleanable surfaces, a removable tray, accessible interior areas, practical door design, durable materials, and easy-to-maintain components can make routine veterinary ICU cage cleaning more efficient.